
ブロックチェーンは難しそうだし、自分で立ち上げてみるなんて無理・・と思っていましたが意外と簡単にできました。Hyperledger Fabric v1.0 をBluemix上で無料で立ち上げてみた手順が以下です。(⇒参照URL)
Gitコマンドが使える環境では、以下のコマンドでCloneを取得することが可能です。(Macなど)
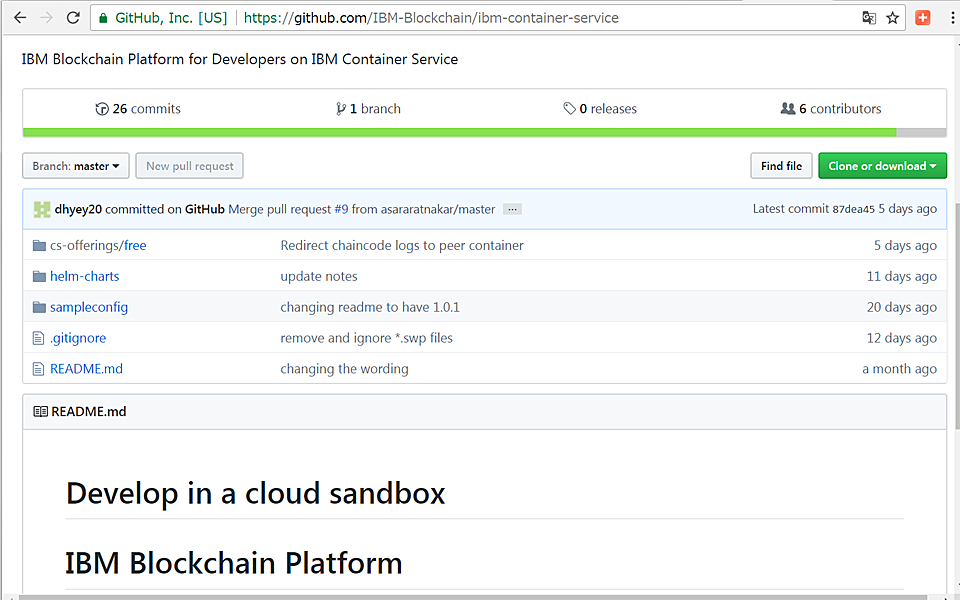
>git clone https://github.com/IBM-Blockchain/ibm-container-serviceWindows等の場合は、まず以下のURLでGitにある、オープンソースのHyperledger Fabric v1.0 をベースにしている IBM Blockchain Platformを確認します。右の緑のボタンを押して「Open in Desktop」でDesktopアプリをダウンロードします。
https://github.com/IBM-Blockchain/ibm-container-service
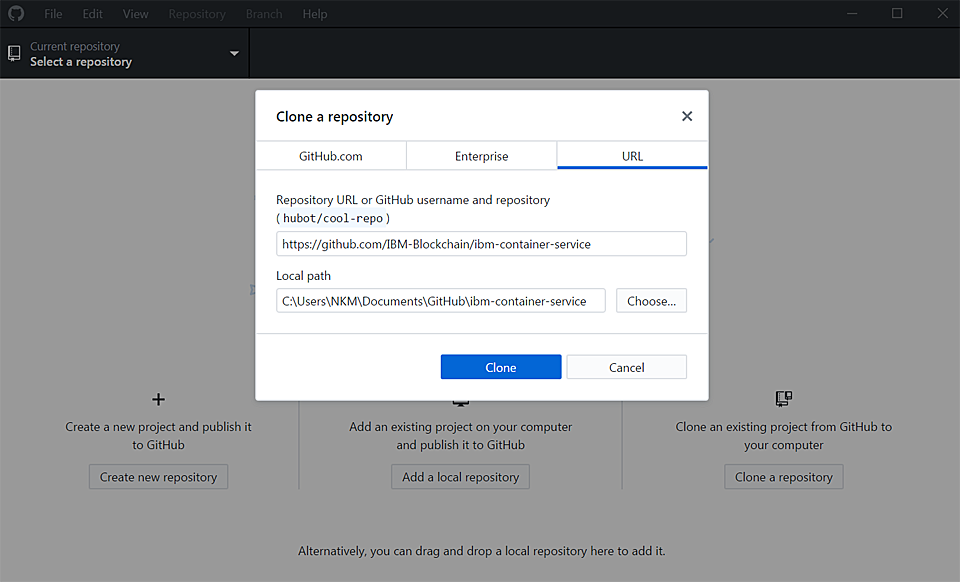
GitHubDesktopSetup.exe (GitDesktopアプリ)を実行し、Create your free accountで新しいGitHubユーザーIDを取得するか、既存の登録IDでログインします。次に「Clone a repository」をクリックし、URLタブに先ほどの以下のURLをインプットして「Clone」します。
https://github.com/IBM-Blockchain/ibm-container-service
Windowsであればコマンド・プロンプトで、上のLocal pathで導入したローカルPCのGitHubディレクトリ(マイドキュメントの下など)の「ibm-container-service」下の「cs-offerings/free/scripts/」ディレクトリに移動して下さい。
>cd ibm-container-service
>cd cs-offerings/free/scripts/
Bluemixではコンテナ管理に全面的に Kubernetes を使うため、⇒このリンク先を見てKubernetes環境のセットアップを実施してください。
(Macなど) Shell Scrptが実行できる環境であれば、そこで以下のシェルを実行すれば全てセットアップができます。
./create_all.shWindowsなどでシェルが実行できない環境の場合や、create_all.shで処理が完了しない場合のために、ステップごとの実行の仕方を以下に記述しておきます (⇒参照URL)。まず、kubectl.exeがあるディレクトリに、パスを通してください(以下の例はWindowsのc:\tempに置いていた場合)。
>set path=c:\temp;%path%Windowsのコマンドプロンプトで下のコマンドを順に実行することで、上のcreate_all.shで実行しているコマンドを順に実行する事ができます。(@remで始まる行以外)
実行する前に、kube-configs ディレクトリにあると同列にあるcreate_channel.yaml.base をコピーして create_channel.yaml という名称にし、「%CHANNEL_NAME%」とあるところを、「channel1」に変更します。
同じディレクトリのjoin_channel.yaml.baseをコピーしてjoin_channel.1yaml という名称にし、「%CHANNEL_NAME%」を「channel1」に、「%PEER_ADDRESS%」を「blockchain-org1peer1:5010」に、「%PEER_MSPIDS%」を「Org1MSP」に、「%MSP_CONFIGPATH%」を「/shared/crypto-config/peerOrganizations/org1.example.com/users/Admin@org1.example.com/msp」に変更します。
そのjoin_channel1.yamlをコピーしてjoin_channel2.yaml という名称にし「channel1」はそのままで、「blockchain-org1peer1:5010」を「blockchain-org2peer1:5010」に、「Org1MSP」を「Org2MSP」に、「/shared/crypto-config/peerOrganizations/org1.example.com/users/Admin@org1.example.com/msp」を「/shared/crypto-config/peerOrganizations/org2.example.com/users/Admin@org2.example.com/msp」に変更します。
同じディレクトリのcomposer-rest-server.yaml.baseをコピーしてcomposer-rest-server.yaml という名称にし、「%COMPOSER_BUSINESS_NETWORK%」を「”0″」に変更します。
chaincode_install.yaml.baseをコピーしてchaincode_install1.yaml という名称にし、「%CHAINCODE_NAME%」を「mycc」に、「”%CHAINCODE_VERSION%”」を「”1.0″」に、「%MSP_CONFIGPATH%」を「/shared/crypto-config/peerOrganizations/org1.example.com/users/Admin@org1.example.com/msp」に、「%PEER_MSPID%」を「Org1MSP」に、「%PEER_ADDRESS%」を「blockchain-org1peer1:5010」に変更します。
chaincode_install1.yamlをコピーしてchaincode_install2.yaml という名称にし、「%CHAINCODE_NAME%」を「mycc」に、「”%CHAINCODE_VERSION%”」を「”1.0″」に、「%MSP_CONFIGPATH%」を「/shared/crypto-config/peerOrganizations/org2.example.com/users/Admin@org2.example.com/msp」に、「%PEER_MSPID%」を「Org2MSP」に、「%PEER_ADDRESS%」を「blockchain-org2peer1:5010」に変更します。
chaincode_instantiate.yaml.baseをコピーしてchaincode_instantiate.yaml という名称にし、「%CHANNEL_NAME%」を「channel1」に、「%CHAINCODE_NAME%」を「mycc」に、「”%CHAINCODE_VERSION%”」を「”1.0″」に、「%MSP_CONFIGPATH%」を「/shared/crypto-config/peerOrganizations/org1.example.com/users/Admin@org1.example.com/msp」に、「%PEER_MSPID%」を「Org1MSP」に、「%PEER_ADDRESS%」を「blockchain-org1peer1:5010」に変更します。
上記のように yaml ファイルを準備後、以下のコマンドを順に実行してください。
@rem create_blockchain (CA,Orderer,Peerのservice作成)
kubectl create -f ..\kube-configs\blockchain-services.yaml

@rem (serviceのデプロイ)
kubectl create -f ../kube-configs/blockchain.yaml

@rem create_channel (channel1 で作成)
kubectl create -f ../kube-configs/create_channel.yaml

@rem join_channel (channel1 で2つのPeerをJoin)
kubectl create -f ../kube-configs/join_channel1.yaml
kubectl create -f ../kube-configs/join_channel2.yaml

@rem 4つのpod(ca,orderer,org1peer1,org2peer1)確認
kubectl get pods
@rem 以下で"Peer joined the channel!"を確認
kubectl logs -f joinchannel

@rem ComposerのPlayground(練習場)とRESTサーバー作成
kubectl create -f ../kube-configs/composer-identity-import.yaml
kubectl create -f ../kube-configs/composer-playground.yaml
kubectl create -f ../kube-configs/composer-playground-services.yaml
kubectl create -f ../kube-configs/composer-rest-server.yaml

@rem ChainCodeの導入
kubectl create -f ../kube-configs/chaincode_install1.yaml
kubectl create -f ../kube-configs/chaincode_install2.yaml

@rem ChainCodeインスタンスの立ち上げ
kubectl create -f ../kube-configs/chaincode_instantiate.yaml

@rem IPアドレスの確認
bx cs workers blockchain
上記の最後のコマンドで、Bluemix上のサーバーのPublic IPアドレスが表示されるので、それを以下の「あなたのIPアドレス」のところに貼り付けて、ブラウザで表示してください。
http://あなたのIPアドレス:31080
Loading Hyperledger Composer… のメッセージの後に「Welcome to Hyperledger Composer Playground!」が表示されていたら、Hyperledgerとその上の開発フレームワークのComposerの導入が完了しています!
「Let’s Blockchain」ボタンを押して、Blockchainをエンジョイしましょう!
注:
No connection could be madeが表示される場合は、set KUBECONFIG=/home/… などが実施されていない場合。
couchDBを使う場合は、blockchain-services.yamlの代わりにblockchain-couchdb-services.yaml を指定し、blockchain.yaml の代わりに blockchain-couchdb.yaml 指定
pods “joinchannel” already exists のエラーがjoin_channel実行の際に出ても特に問題ない。
pods “chaincodeinstall” already exists のエラーがchaincode_install実行の際に出ても特に問題ない。
チャネルを一度削除して作り直す場合は、以下を実行。
>kubectl delete -f ../kube-configs/create_channel.yaml